Imagine watching a beautiful ballet or a high-energy hip-hop performance. Dancers glide, leap, twist, and turn to the rhythm of the music, showcasing their incredible strength and flexibility. Now, you might think, “That’s great for them, but I’m no dancer.” True, you might not be grooving to jazz in your living room or performing a pirouette while waiting for your coffee. But here’s a surprise: the stretches that dancers use to achieve those amazing moves?
They’re beneficial for everyone, dancer or not. Why? Because keeping our bodies limber and flexible isn’t just about dance; it’s about everyday life. Whether you’re reaching for a jar on the top shelf or tying your shoe, a more flexible body means fewer chances of getting hurt.
So, let’s dive into these dance-inspired stretches that can make you feel more nimble in your daily routines!
The Butterfly Dance Stretch: A Simple Guide
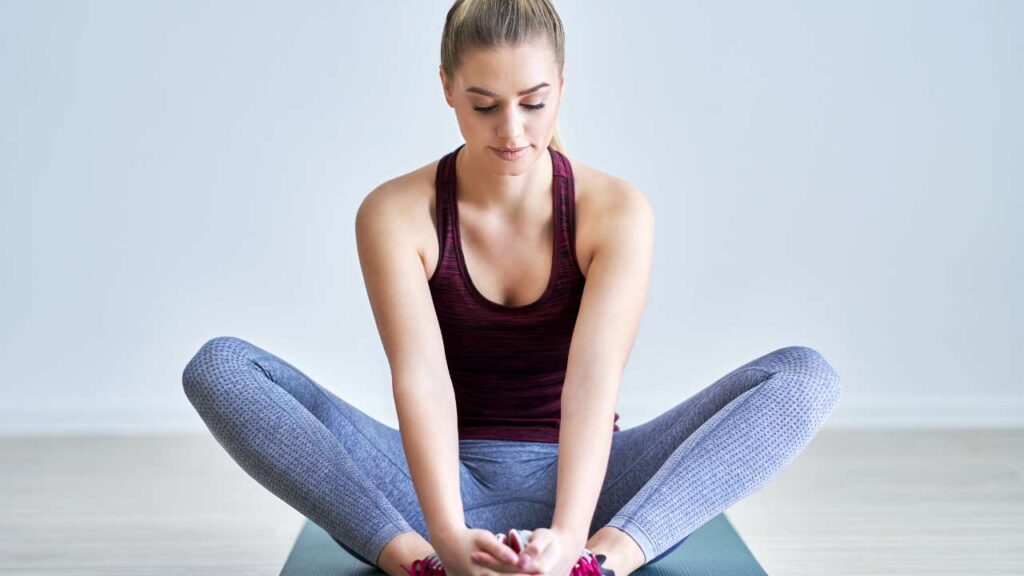
Ever noticed how dancers seem to move with such ease and grace, their bodies bending and stretching effortlessly? Well, they have a secret: it’s called the Butterfly Dance Stretch. This easy and effective move targets the muscles in the inner thigh and groin area, helping dancers achieve those beautiful moves. But you don’t have to be a dancer to benefit from this stretch. Whether you’re an athlete, a yoga enthusiast, or someone simply looking to improve flexibility, the Butterfly Stretch is for you.
Here’s how you can master it in a few easy steps:
- Find Your Spot: Begin by choosing a comfortable spot on the floor. Maybe put down a yoga mat or a soft carpet to sit on.
- Get Seated: Once you’re settled, sit down and place your feet flat on the ground, legs bent at the knees.
- Create a Butterfly: This is where the stretch gets its lovely name. Let your knees drop open to each side, like the wings of a butterfly. The soles of your feet should be touching each other, forming the butterfly’s body.
- Pull In Close: Try to bring your heels as near to your groin as feels good. Remember, we’re aiming for a gentle stretch here, not any discomfort or pain. So only go as far as it’s comfortable for you.
- Gentle Bounce: With your back straight and tall (imagine a string pulling you up from the crown of your head), start a gentle up-and-down bouncing motion with your knees. It’s like your butterfly is flapping its wings! Do this for about eight to 10 seconds.
- Press Down: Now, here’s where you get a deeper stretch. Using your elbows, gently press on your thighs, pushing your knees closer to the ground. Hold this press for another eight to 10 seconds. Remember to breathe deeply and ensure you’re not forcing your knees down. Just apply gentle pressure.
- Notice the Difference: As you make the Butterfly Stretch a regular part of your routine, you’ll likely find that your knees get closer to the ground with less effort. This is a sign that your flexibility is improving. So, celebrate those little victories!
Incorporating the Butterfly Stretch into your daily or weekly routine can work wonders for your flexibility. Plus, it’s a calm and meditative movement that can be a pleasant break from the hustle and bustle of everyday life. So why not give your inner dancer a chance to shine and give this stretch a try?
Ceiling and Toe Touch: Stretching Made Simple
Stretching is a secret weapon. It’s the magic trick that dancers use to gracefully glide across the stage and the magic trick you can use to feel more limber and relaxed in your everyday life. One particularly effective routine that combines a series of movements for an all-around stretch is the “Ceiling and Toe Touch.” It’s like giving your back, sides, arms, and legs a mini-vacation!
Let’s break it down, step by step:
Ceiling Touch:
- Set the Scene: Find a comfortable spot on the floor where you have enough space to stretch out. A yoga mat or a carpeted area works best.
- Take a Seat: Sit down with your legs extended straight out in front of you. Make sure you’re sitting tall, with your spine erect. Think of it as your proud, “look-at-me-I’m-stretching” posture!
- Reach for the Stars: With your fingers extended and palms facing each other, stretch both arms up towards the ceiling as if you’re trying to touch it.
- Side Stretch – Left: Now, while reaching up high, press your left arm towards the ceiling a little more than the right, giving the left side of your body a lovely stretch. Hold this for about five to 10 seconds. Feel the elongation along your side.
- Side Stretch – Right: Time for the other side! Repeat the process, this time pressing the right arm upwards to stretch the right side of your body. Again, hold for five to 10 seconds.
Toe Touch:
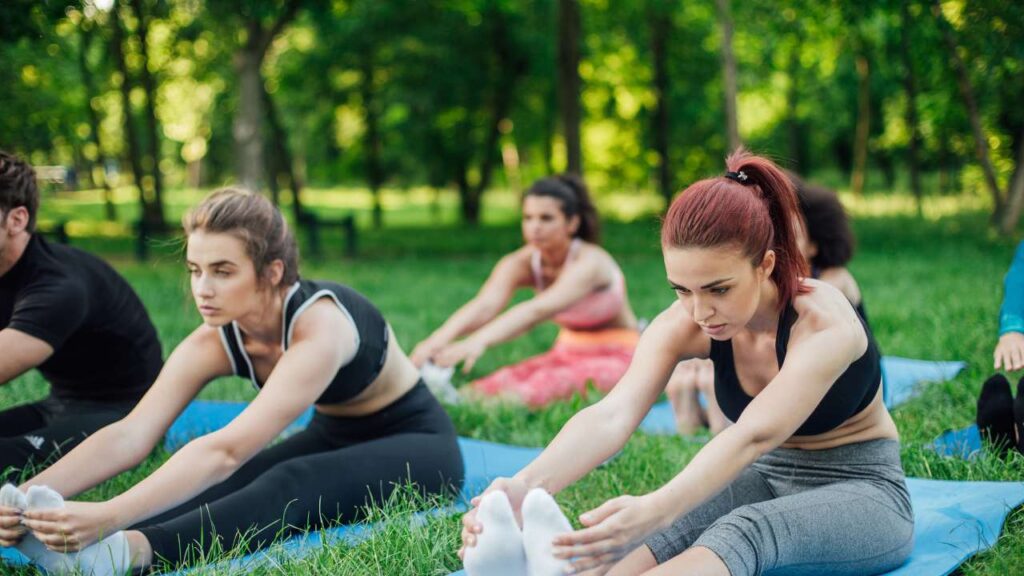
- Arms Forward: After stretching towards the ceiling, bring both arms forward in front of you.
- Lean In: Here’s the toe-targeting part! Keep your back straight, and slowly hinge forward at the waist, as if you’re trying to bring your chest to your knees. Extend your arms towards your toes.
- Touchdown: Depending on your flexibility, try to touch your toes, or just go as far as is comfortable for you. It’s okay if you can’t touch them just yet—every bit of stretching counts. Hold this position for 10 to 15 seconds. As you do this regularly, you might find yourself getting closer to those toes each time.
Bonus: Standing Toe Touch:
- Stand Tall: Once you’re ready, stand up with feet hip-width apart.
- Reach Down: Just like in the seated version, extend your arms in front and hinge at the waist, aiming to touch your toes. It’s a bit trickier in the standing position, so make sure you’re careful, especially if you have any knee or lower back concerns.
A Few Things to Remember:
The standing version of the toe touch can put more stress on your knees and lower back. If you feel any discomfort, it’s best to stick to the seated version.
Listen to your body. Stretching should feel good, not painful. Never force a stretch.
Over time, with consistency, you’ll likely notice increased flexibility. It’s a journey, so enjoy every stretch along the way!
Incorporating the Ceiling and Toe Touch routine into your days can make a noticeable difference in how limber and relaxed you feel. So, next time you need a quick break or a morning boost, give this dance-inspired stretch a whirl. You might not be on stage, but your body will surely thank you with a standing ovation!
Kneeling Quad Stretch: A Guide to Better Leg Flexibility
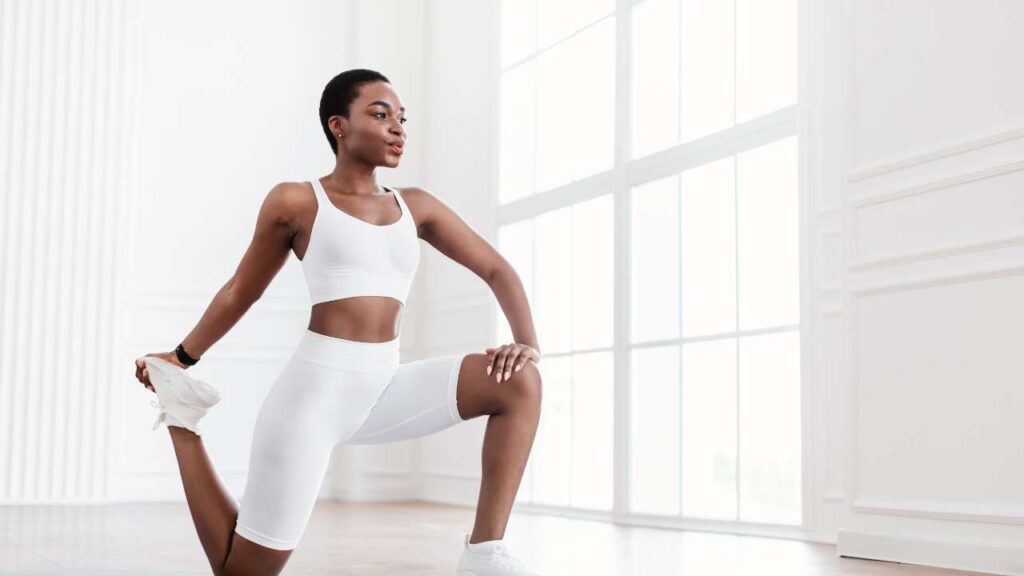
Have you ever marveled at how certain athletes or dancers seem to have rubber-band-like flexibility in their legs? Well, one of their secrets is probably the “Kneeling Quad Stretch.” This stretch isn’t just great for those who prance on stages or sprint on tracks; it’s for anyone who wants to feel more agile and reduce the risk of leg injuries.
Before we dive into the steps, let’s understand why this stretch is essential. The ‘quadriceps’ might sound like a fancy term, but it’s just the group of muscles at the front of your thigh. When these muscles are tight, it can affect our movement, posture, and even lead to potential injuries. By performing the Kneeling Quad Stretch, we’re ensuring that these muscles remain flexible and less prone to strains.
So, ready to give it a shot? Let’s break it down:
- Find Your Ground: Start by finding a soft spot to kneel on, like a yoga mat or a carpeted area, to ensure your knees are comfortable.
- Begin Kneeling: Position yourself on both knees, ensuring your back is straight. Think of yourself as a soldier standing at ease.
- Position Your Left Foot: Carefully bring your left foot forward, placing it flat on the ground. This movement is similar to when you’re about to propose to someone but without the ring! Your left knee should now form a 90-degree angle, creating a clear “L” shape.
- Feel the Stretch: Here comes the magic part. Gently push your hips forward towards your left leg. This action isn’t about how far you can go but about feeling a good stretch. As you do this, you’ll notice the sensation in your right quadriceps (the front part of your upper right leg) and, simultaneously, a stretch in your left hamstring (the back part of your upper left leg).
- Balance and Hold: Maintain your balance. If you feel wobbly, it’s completely okay to hold onto something stable, like a low table or a chair. Once you’re settled into the stretch, hold it for a good 10 to 15 seconds. This pause is your moment to take a few deep breaths and enjoy the stretch.
- Switch It Up: Gently release the stretch and come back to the initial kneeling position. Now, it’s time to give your other leg some love. Repeat the steps, this time with your right foot forward.
A Few Tips to Remember:
Always ensure that your back remains straight throughout the stretch. This posture not only enhances the effectiveness of the stretch but also ensures you’re stretching safely.
Listen to your body. While stretching should provide a sensation, it shouldn’t be painful. If you feel any sharp pain, it’s a sign to ease up.
Consistency is key. The more regularly you practice the Kneeling Quad Stretch, the better your flexibility will become over time.
The Kneeling Quad Stretch is like a mini spa session for your legs. It’s an excellent way to keep them feeling loose and agile, whether you’re an athlete, a weekend warrior, or someone just looking to move more comfortably in daily life. So, next time you feel your legs need a little extra care, drop to one knee and give them the stretch they deserve!
See Alex Larsson’s Hyperbolic Stretching Review>>
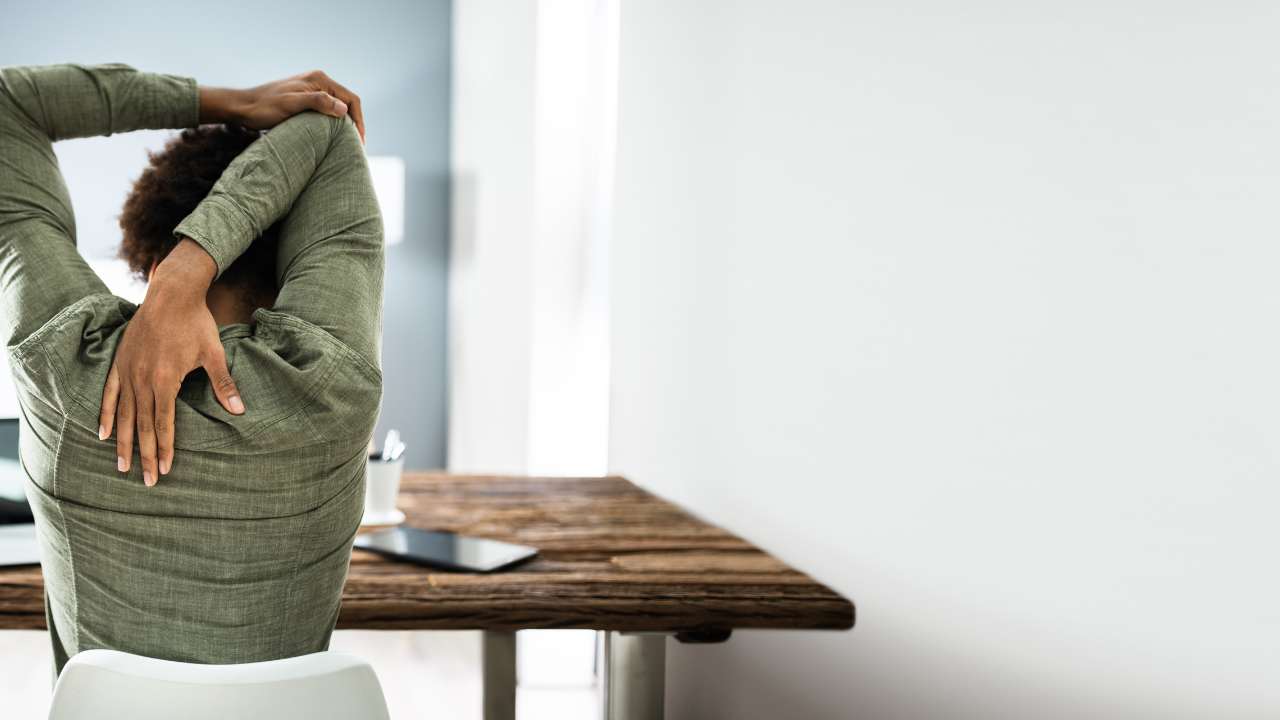
Overhead Triceps Stretch: A Simple Guide to Limber Limbs
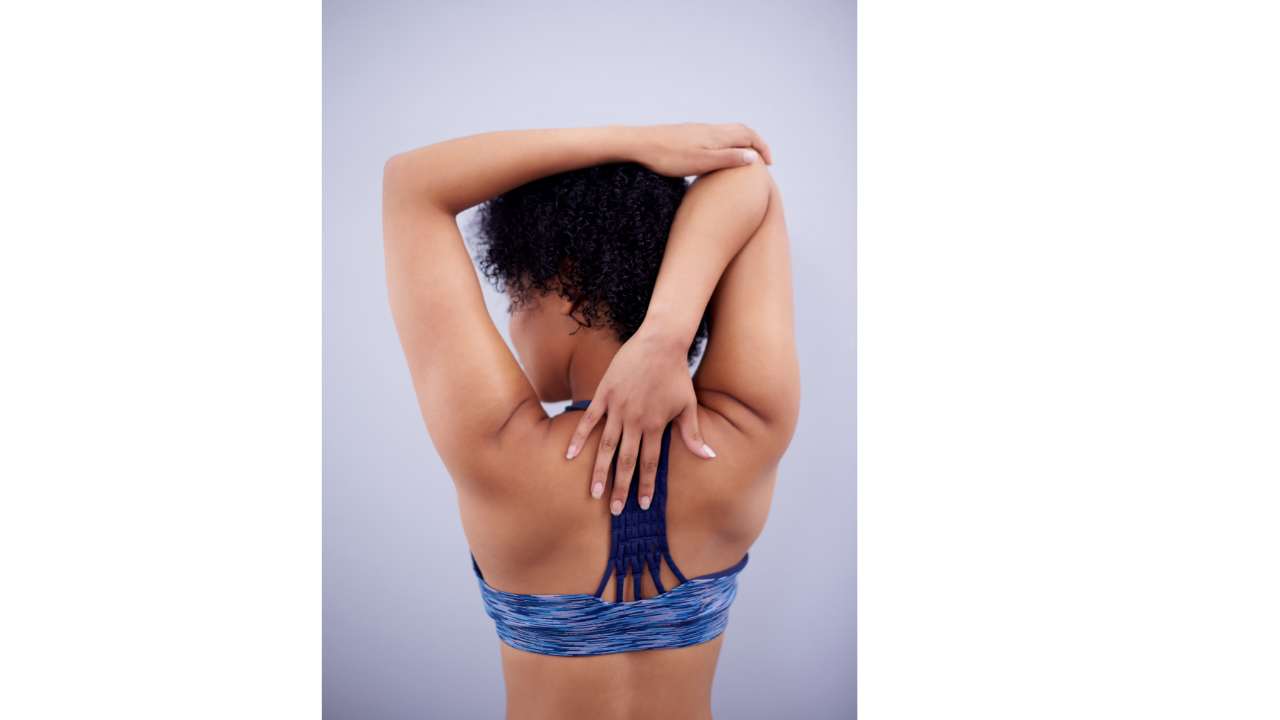
When many of us picture a dancer, we often think of graceful legs and a flexible torso, bending and twirling in rhythm. But have you ever noticed a dancer’s arms? Just like a painter needs flexible wrists or a pianist nimble fingers, a dancer’s arms and shoulders need to be super limber to paint those beautiful motions in the air.
This guide introduces you to a straightforward yet highly effective stretch called the “Overhead Triceps Stretch.” It’s all about giving your arms and shoulders the love and flexibility they deserve, whether you’re aiming for the dance floor or simply want a good stretch after a day at the desk.
Let’s dive right in:
- Get Ready: Stand or sit in a comfortable position. Ensure your spine is straight – imagine there’s a string pulling you up from the top of your head.
- Link and Lift: Interlock your fingers, like you’re making a bird’s beak with both hands. Now, give your wrists a little twist so that the palms of your hands face away from your body like you’re trying to show someone a magic trick.
- Reach for the Sky: Gently lift your linked hands above your head, as if you’re trying to touch the ceiling. You’ll start to feel a stretch in your shoulders and arms. Hold this reaching pose for about 10 seconds, taking deep breaths. Then, slowly lower your arms back down.
- The Triceps Touch: Now, for the main event! Place your left hand behind your head, like you’re thinking really hard about something. Your elbow should be pointing upward.
- Guide the Elbow: Using your right hand, grasp your left elbow. Gently press it downwards, coaxing your left hand further down your back. This movement might make you feel like a contortionist, but remember, only go as far as it’s comfortable for you. You should feel a stretch in the back of your arm – that’s the tricep muscle saying hello!
- Hold and Breathe: Keep this position for eight to 10 seconds. Inhale and exhale deeply, savoring the stretch.
- Switch it Up: It’s only fair to treat both arms equally. Release the stretch and switch sides. Now, your right hand goes behind your head, and your left hand guides the elbow down.
A Few Gentle Reminders:
Stretching is about feeling good, not reaching a specific goal or position. It’s okay if you can’t press your hand very far down your back. Over time and with regular practice, you’ll likely increase your flexibility.
Always keep movements smooth and avoid any jerky motions. It’s about quality, not speed.
So, next time you think of flexibility, remember that your arms play a vital role, too. With the Overhead Triceps Stretch, you’re not only prepping yourself for graceful dance moves but also ensuring a good stretch for those arms that help you do so much every day. Give it a try, and let your limbs revel in the relaxation!
Conclusion:
Even if you aren’t planning to join a dance class or perform on stage, doing these stretches can still be a game-changer. Sat too long at your desk? Stretch. Played a bit too hard in the backyard? Stretch. Feeling a bit stiff after binge-watching your favorite show? You got it: stretch.
These dance stretches, whether they’re for the legs, back, or arms, are like little mini-breaks for your body. They shake things out, get the kinks out, and make sure everything’s running smoothly.
So, in short: Dance stretches aren’t just for dancers. They’re for all of us who want to move better, feel better, and avoid feeling stiff and sore. Give them a try. Your body will thank you for it. And who knows? Maybe you’ll even break out a dance move or two in the process! Go on, stretch it out, and feel the difference.
References:
ExRx.net : Kneeling Quadriceps Stretch

